| Manufachturer | WAS Worldwide Analytical Systems AG |
| Model | Foundry-Master |
Brief Description
A spark discharge vaporizes sample material in the spark stand and excites the released atoms and ions to emit radiation. A light guide directs the emitted radiation to the optical systems, where the radiation's decomposition into individual spectral components occurs. The radiation intensity, which is proportional to the sample elements' concentration, is processed internally and compared with calibration data stored in the instrument. The output is delivered in the form of percentage concentrations.
Technical Specifications:
| Usable Wavelength Range | 170 ... 800 mm |
| Excitation Voltage | 300 ... 500 V |
| Optical Spectroscope | Rowland circle with Ø 350 mm |
Main Areas of Application:
- Determination of alloy compositions
- Copper, aluminium, iron, and nickel-based materials
| Manufacturer | LECO |
| Model | LM100AT |
Brief Description:
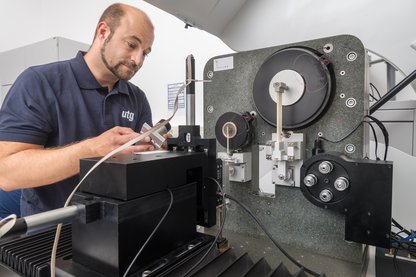
The Vickers test is a hardness test for testing homogeneous materials. The required calculation of the hardness value is independent of the indenter's size and the hardness of the material. The principle requires the resistance the material offers to a harder indenter (diamond pyramid) or permanent deformation results. Vickers testing applies to all metals. It also has the broadest range of applications of all hardness testing methods. The indentation surface calculation uses the length of the permanent indentation's diagonal determined using a measuring microscope. The ratio of the test force in Newton to the indentation surface (d in mm) multiplied by a factor of 0.1891 gives the Vickers hardness (VHN). The Vickers hardness value is composed of the measured hardness value and the test conditions: e.g., 550HV1, hardness value 550
Technical Specifications:
| Maximum Specimen Size | Ø 50 mm |
| Vickers Indenter | |
| Small Load | HV0,2 ... HV1 |
| Micro Range | HV0,1 ... HV0,02 |
| Load Ranges | 1 ... 1000 gf |
| Objective Lenses | 10x, 20x, 50x |
| Norm | DIN EN ISO 6507-1:2018 to -4:2018 |
Main Areas of Application:
- Surface hardness, e.g., after cutting process
- Surface hardness after surface treatment, e.g., case hardened (eht), nitided (nht), surface hardened (rht)
- Hardness differences after heat treatments, hardness variations in composite materials
- Material characterization of new casting materials, testing of homogeneous materials
- Hardness mapping of the shear influence zone
- Weld seam testing
| Manufacturer | Micro Materials |
| Model | NanoTest Vantage - Plattform 4 |
Brief Description:
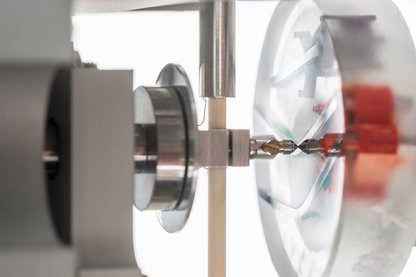
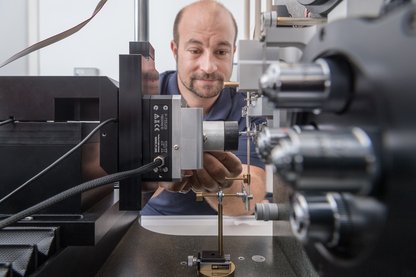
Nanoindentation is an instrumented indentation test for determining material properties. The hardness and Young's modulus of the material are determined locally at the specimen surface. Based on the measurement results, it is possible to investigate the residual stress state in the measured area. In addition to nanoindentation, microhardness measurement is possible with the NanoTest Vantage. The evaluation procedure using measured force-displacement curves offers the great advantage of an automatic and fast evaluation of many measuring points.
Technical Specifications:
| Low Load Head (Nanoindentation) | |
| Maximum Test Force | 500 mN |
| Maximum Indentation Depth | 20,1 µm |
| Indenter Types | Berkovich indenter, spherical indenter (r = 2 µm / 5 µm / 10 µm), fiber punch indenter |
| High Load Head (Microhardness Measurement) | |
| Maximum Test Force | 30 N |
| Maximum Indentation Depth | 50,6 µm |
| Indenter Types | Vickers indenter, Berkovich indenter |
Main Areas of Application:
- Nano hardness measurement
- Mikrohardness measurement
- E-modulus measurement
- Residual stress analysis
Photo Gallery:
| Manufacturer | Keyence Corporation |
| Model | VHX-2000 |
Brief Description:
Due to the digital microscopes' high depth of field and resolution and the wide magnification range of 20x - 1000x, the VHX-2000 finds application in the optical documentation of various sample materials and test components. With the high resolution and various filter and illumination attachments, even the smallest structures and almost all surfaces are examinable. Qualitative analyses of cutting surface characteristics, the wear progress on active elements, or microstructure examinations on micrographs are areas of application of the digital microscope. Further areas of application include examinations of casting and molding materials or binder systems. Its unique design also means that it can be used in mobile applications, enabling microscopic images of large forming tools, for example.
Technical Specifications:
| Magnifications | 20 ... 1000 - fold |
| X-Y Traverse Path | je 100 mm |
| Camera | 18 megapixel; 16-bit resolution |
Main Areas of Application:
- Wear documentation
- Cutting surface images
- Topography and microstructure analyses
Equipment:
- Tripod with motor-driven XYZ axis
- A lens with a magnification range 20x - 200x
- Objective with magnification range 100x – 1000x
- Polarizing filter
- Various attachments for setting the object illumination
| Manufacturer | Carl Zeiss |
| Model | Axioplan |
Brief Description:
The Axioplan optical microscope finds its use for the optical examination, analysis, and documentation of metallographic sections. At magnifications of 25 up to 1000 fold, microstructures are displayed and evaluated using brightfield, darkfield and polarization contrast. The AxioVision software supports the analysis methods.
Technical Specifications:
| Magnifications | 25/50/100/200/500/1000-fold |
| Types of Lighting | Bright field, dark field, polarization contrast |
| Camera | MRc 5 (mid-range microscopy camera including driver software 64-bit, selectable resolution in interlace mode) |
Main Area of Application:
- Quantitative und qualitative microstructural analysis of metallographic samples
| Manufacturer | QATM |
| Model | BRILLIANT 220 |
Brief Description:
The BRILLANT 220 precision wet cutting grinding machine is a compact, accurate cutting device that, with three automatic axes and numerous cutting functions, offers the highest possible flexibility for low-contact, accurate cutting. A line laser maps the cut-off section on the component before cutting so that the workpiece can be precisely aligned. For the cutting process, one can choose continuous and intermittent feed, which offers better cooling of the components.
Technical Specifications:
| Maximum Specimen Size | Ø 75 mm |
| Cutting Disc Size | 75 ... 200 mm |
| Table Size (W x D) | 280 mm x 210 mm (BxT) |
| Feed Rate | 0,005 ... 3 mm/s |
| Crosscut (Y-axis) | 80 mm |
| Driving Section (X-axis) | 210 mm |
| Infeed Accuracy /X-/Y-axis) | 0,1 mm |
| Adjustable Rotation Speed | 300 ... 5000 rpm |
Main Area of Apllication:
- Sample preparation for cut surface characterization and metallographic investigations
| Manufacturer | ATM Q Ness GmbH |
| Model | SAPHIR 560 / RUBIN 520 |
Brief Description:
The SAPHIR 560 / RUBIN 520 is a two-spindle grinding and polishing machine with an innovative grinding and polishing head. Single and central pressure, memory function, dosing system, motorized height adjustment, variable height adjustment, synchronous and counter-rotation, and cooling are some of this unit's features. The unit finds use to grind and polish metallic and non-metallic samples, manually or semi-automatically. In semi-automatic use, one can prepare up to six specimens simultaneously. Grinding removes material from a damaged or deformed surface while minimizing re-deformation. The goal is to obtain a flat surface with minimal damage that the polishing process can quickly remove. Fixed abrasive particles help remove the material. Like grinding, polishing removes damage caused in the previous processing steps. Polishing in several steps with increasingly finer grains of polishing agent creates the desired surface.
Technical Specifications:
| Working Disc | Ø 300 mm |
| Variable Rotation Speed of the Device's Disc Variable Rotation Speed of the Polishing Head's Specimen Holder | 50 ... 600 rpm 30 ... 150 rpm |
| Number of Samples in a Single Print Number of Samples under Central Pressure | 1 ... 6 samples according to the specimen holder |
| Specimen Contact Pressure under Single Contact Pressure Specimen Contact Pressure under Central Contact Pressure | 5 ... 100N 20 ... 400N |
Main Areas of Application:
- Grinding and polishing metallic and non-metallic samples for further metallographic examinations (micrographs, microhardness measurement, ...)
| Manufacturer | ATM Q Ness GmbH |
| Model | OPAL 460 |
Brief Description:
The Opal 460 is a fully hydraulic, water-cooled warm mounting press for mounting ground sections. In hot mounting, one mounts the specimen in a mounting press under temperature and pressure with a plastic granulate. This process's advantages are the high hardness of the embedding material (e.g., reinforced glass fiber ) and its gap-free property. Hot mounting materials are available as epoxy resin, acrylic resin, phenolic resin, and graphite resin bases.
Technical Specifications:
| Press Mold | Ø 30 mm, Ø 50 mm |
| Temperature Range | 20 ... 200 °C |
| Maximum Pressure | 310 bar |
Main Areas of Application:
- The hot mount press creates holding surfaces for the specimen preparation, used for further metallographic studies


